1. 우분투에 openvpn 서버 설치
1.1 설치
$ sudo apt-get install openvpn
openvpn 설정
$ sudo vim /etc/default/openvpn
AUTOSTART=”openvpn” 추가
RAS 설정
설정 파일 복사
RAS 설정을 위해 파일 복사를 수행한다.
$ sudo cp -r /usr/share/doc/openvpn/examples/easy-rsa/ /etc/openvpn
환경 설정
$ source /etc/openvpn/easy-rsa/2.0/vars
private key 생성
$ cd /etc/openvpn/easy-rsa/2.0
$ ./build-ca
server key 생성
client key 생성
$ cd /etc/openvpn/easy-rsa/2.0
$ ./build-key [username]
[username]에 원하는 사용자 이름 입력
Diffie Hellman 파라메터 생성
$ cd /etc/openvpn/easy-rsa/2.0
$ ./build-dh
생성된 파일
위 과정을 마치면 /etc/openvpn/easy-rsa/2.0/keys 에
ca.crt
server.crt
server.csr
server.key
username.csr
username.crt
username.key
dh1024.pem
파일이 생성된다.
1.2 OpenVPN 서버 설정
기본 설정 파일 복사
$ cp /usr/share/doc/openvpn/examples/sample-config-files/server.conf.gz /etc/openvpn/
$ gzip -d server.conf.gz
$ mv server.conf openvpn.conf
server.conf 파일 설정
$ vim /etc/openvpn/openvpn.conf
# Any X509 key management system can be used.
# OpenVPN can also use a PKCS #12 formatted key file
# (see “pkcs12” directive in man page).
ca /etc/openvpn/easy-rsa/2.0/keys/ca.crt
cert /etc/openvpn/easy-rsa/2.0/keys/server.crt
key /etc/openvpn/easy-rsa/2.0/keys/server.key # This file should be kept secret
# Diffie hellman parameters.
# Generate your own with:
# openssl dhparam -out dh1024.pem 1024
# Substitute 2048 for 1024 if you are using
# 2048 bit keys.
dh /etc/openvpn/easy-rsa/2.0/keys/dh1024.pem
# to reach other private subnets behind
# the server. Remember that these
# private subnets will also need
# to know to route the OpenVPN client
# address pool (10.8.0.0/255.255.255.0)
# back to the OpenVPN server.
push “route 192.168.10.0 255.255.255.0”
1.3 테스트
$ openvpn –config /etc/openvpn/openvpn.conf
디바이스 확인
$ ifconfig
…..
tun0 Link encap:UNSPEC HWaddr 00-00-00-00-00-00-00-00-00-00-00-00-00-00-00-00
inet addr:192.168.0.1 P-t-P:192.168.0.2 Mask:255.255.255.255
UP POINTOPOINT RUNNING NOARP MULTICAST MTU:1500 Metric:1
RX packets:30982 errors:0 dropped:0 overruns:0 frame:0
TX packets:41385 errors:0 dropped:0 overruns:0 carrier:0
collisions:0 txqueuelen:100
RX bytes:2438230 (2.4 MB) TX bytes:49162317 (49.1 MB)
2. 안드로이드에 openvpn client 설치
OpenVPN Installer, OpenVPN Settings 설치
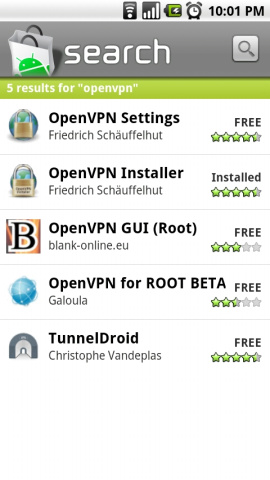
OpenVPN Settings 와 OpenVPN Installer 둘 다 설치합니다.
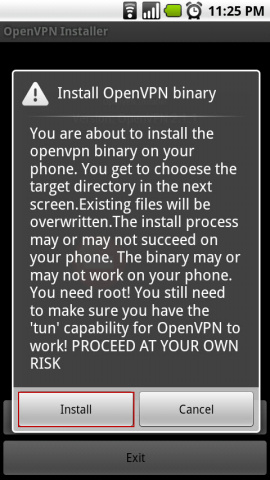
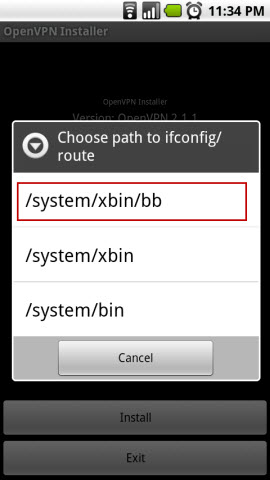
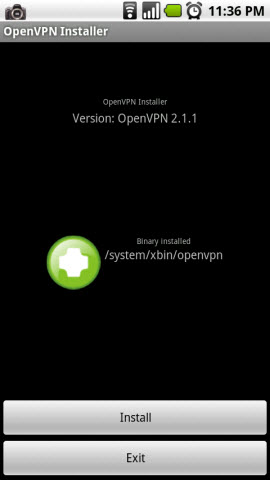
OpenVPN Installer 실행
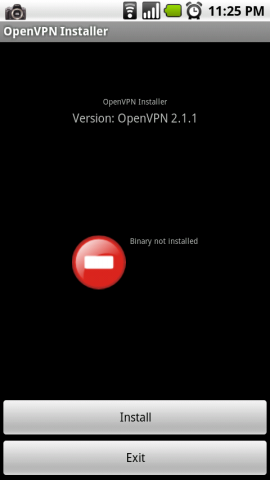
OpenVPN Installer를 실행하면 위와 같은 화면이 나옵니다. Install 버튼을 누릅니다.

OpenVPN Settings
key 복사
앞서 만들었던 다음의 파일을 안드로이드 폰의 /sdcard/openvpn 으로 복사합니다.
ca.crt
username.csr
username.crt
username.key
client.conf 파일 복사
/sdcard/openvpn 디렉토리에 우분투 서버의 /usr/share/doc/openvpn/sample-config-files/client.conf 파일을 복사합니다.
client.conf 파일 설정
ca /sdcard/openvpn/ca.crt
cert /sdcard/openvpn/username.crt
key /sdcard/openvpn/username.key
192.168.55.1 ip 주소는 서버가 존재하는 ip 주소를 나타낸다.
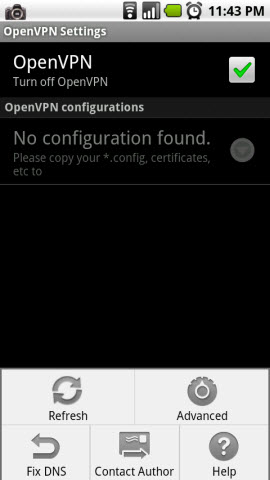
config 파일이 위치하는 곳을 지정하고 OpenVPN 설정을 하면 접속되었다는 메시지가 뜬다.
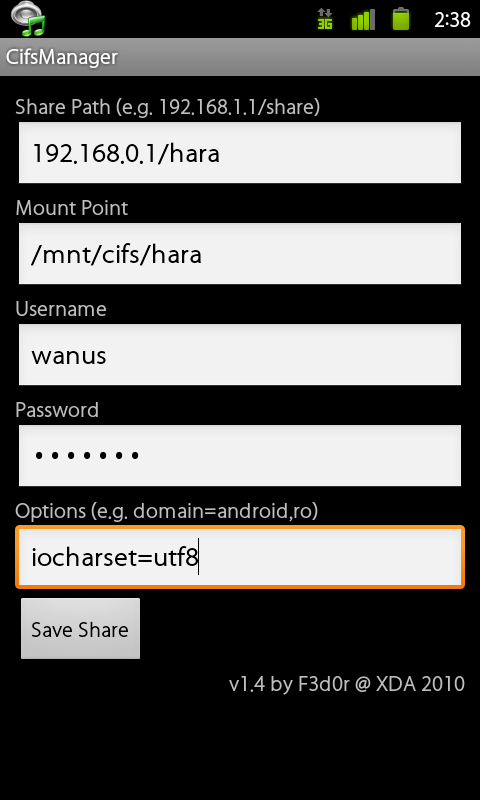
3. cifs-manager
vpn 접속 후 cifs-manager 설정을 해준다.
Reference
- Joinc WIKI : http://goo.gl/Zh06k