Nuxt 설치
Vue cli 설치
yarn global add @vue/cli
# 또는
npm install -g @vue/cli
프로젝트 디렉토리 생성
mkdir deliveroo-clone-tutorial
cd deliveroo-clone-tutorial
frontend 디렉토리 생성
yarn create nuxt-app frontend
# 또는
npx create-nuxt-app frontend
# 또는
npm init nuxt-app frontend
Nuxt 프로젝트를 생성하면 아래와 같은 옵션 설정이 가능하다. 본 포스트에서는 기본 설정으로만 진행한다.
$ yarn create nuxt-app frontend
yarn create v1.22.4
[1/4] ?  Resolving packages...
[2/4] ?  Fetching packages...
[3/4] ?  Linking dependencies...
[4/4] ?  Building fresh packages...
success Installed "create-nuxt-app@2.15.0" with binaries:
      - create-nuxt-app

create-nuxt-app v2.15.0
✨  Generating Nuxt.js project in frontend
? Project name frontend
? Project description My splendid Nuxt.js project
? Author name Victor Lee
? Choose programming language JavaScript
? Choose the package manager Yarn
? Choose UI framework None
? Choose custom server framework None (Recommended)
? Choose Nuxt.js modules (Press <space> to select, <a> to toggle all, <i> to invert selection)
? Choose linting tools (Press <space> to select, <a> to toggle all, <i> to invert selection)
? Choose test framework None
? Choose rendering mode Universal (SSR)
? Choose development tools (Press <space> to select, <a> to toggle all, <i> to invert selection)

?  Successfully created project frontend

  To get started:

	cd frontend
	yarn dev

  To build & start for production:

	cd frontend
	yarn build
	yarn start

✨  Done in 51.77s.
프로젝트 실행
cd frontend && yarn dev
# 또는
cd frontend && npm run dev
정상 실행되면 터미널에 아래와 같은 메시지들이 출력 된다.
$ yarn dev
yarn run v1.22.4
$ nuxt

   ╭─────────────────────────────────────────────╮
   │                                             │
   │   Nuxt.js v2.12.2                           │
   │   Running in development mode (universal)   │
   │                                             │
   │   Listening on: http://localhost:3000/      │
   │                                             │
   ╰─────────────────────────────────────────────╯

ℹ Preparing project for development                                                                                                                                      10:17:42
ℹ Initial build may take a while                                                                                                                                         10:17:42
✔ Builder initialized                                                                                                                                                    10:17:42
✔ Nuxt files generated                                                                                                                                                   10:17:42

✔ Client
  Compiled successfully in 3.45s

✔ Server
  Compiled successfully in 3.44s

ℹ Waiting for file changes                                                                                                                                               10:17:46
ℹ Memory usage: 217 MB (RSS: 282 MB)                                                                                                                                     10:17:46
ℹ Listening on: http://localhost:3000/
웹사이트 접속
링크 : http://localhost:3000/
UIKit 설치
frontend 디렉토리에서 다음 명령을 실행한다.
yarn add uikit
./frontend/plugins/uikit.js 파일을 생성해주고 다음 코드를 입력해준다.
import Vue from 'vue'

import UIkit from 'uikit/dist/js/uikit-core'
import Icons from 'uikit/dist/js/uikit-icons'

UIkit.use(Icons)
UIkit.container = '#__nuxt'

Vue.prototype.$uikit = UIkit
이제 추가한 플러그인이 참조 될 수 있도록 nuxt.config.js 파일을 수정한다.
...
css: [
  "uikit/dist/css/uikit.min.css",
  "uikit/dist/css/uikit.css",
],
/*
** Plugins to load before mounting the App
*/
plugins: [
  { src: '~/plugins/uikit.js', ssr: false }
],
...
Header Component 생성
frontend/components/Header.vue 파일을 만들고 다음 내용을 입력한다.
<template>
  <client-only>
    <nav class="uk-navbar-container" uk-navbar>
        <div class="uk-navbar-left">

            <ul class="uk-navbar-nav">
                <li class="uk-active"><router-link tag="a" class="navbar-brand" to="/" exact>Deliveroo clone</router-link></li>
                <li><router-link tag="a" class="navbar-brand" to="/restaurants" exact>Restaurants</router-link></li>
            </ul>

        </div>

    </nav>
  </client-only>
</template>
다음으로 frontend/layouts/default.vue 파일의 기존 내용을 지우고 다응 내용으로 전부 바꿔준다.
<template>
  <div>
    // You call your new Header component
    <Header />

    <div class="uk-section uk-section-default">
      <div class="uk-container uk-container-large">

        // This is where all yours pages will be
        <nuxt />

      </div>
    </div>

  </div>
</template>

<script>
// Import your new Header component
import Header from '~/components/Header.vue'
export default {
  components: {
    Header
  }
}
</script>
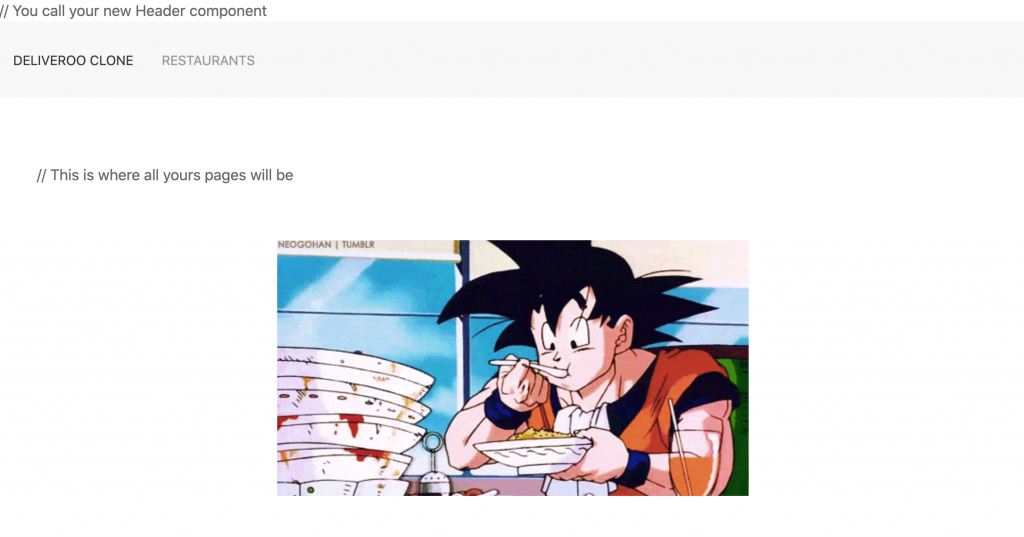
다음으로 /frontend/pages/index.vue 파일의 기존 내용을 지우고 아래 내용으로 변경해준다.
<template>
  <div>
    <img src="https://media.giphy.com/media/zBL9j9oiR3VM4/giphy.gif" class="uk-position-center" alt="">
  </div>
</template>
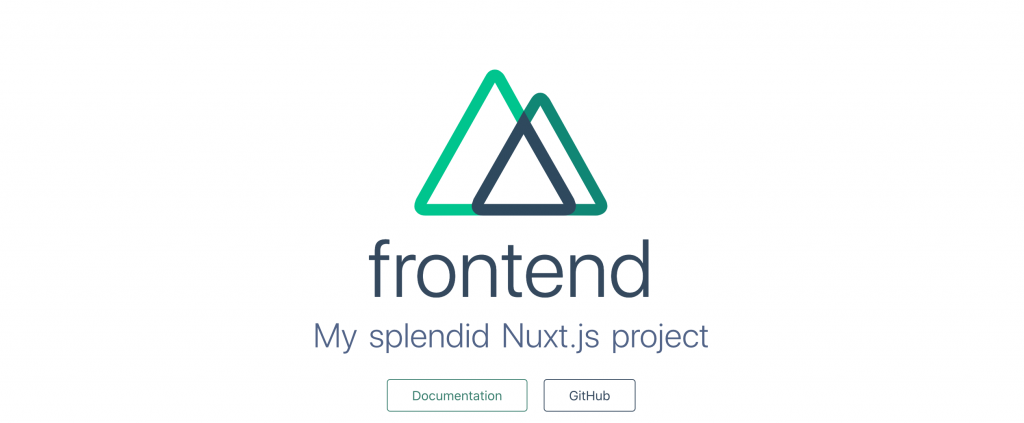
여기까지 완료하고 다시 웹페이지를 로딩 해보면 다음과 같은 결과물을 확인할 수 있다.
frontend 준비를 완료했다. 다음으로는 strapi를 이용해 backend 작업을 진행하겠다.
strapi 설치
앞서 생성한 프로젝트 디렉토리인 deliveroo-clone-tutorial 에서 backend 프로젝트를 만들자. 다음 명령을 사용한다.
yarn create strapi-app backend --quickstart
# 또는
npx create-strapi-app backend --quickstart
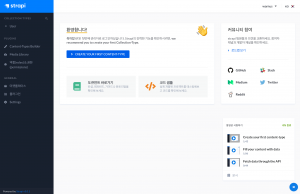
프로젝트 생성이 완료되고 http://localhost:1337/admin/ 에 접속하면 다음과 같은 strapi admin 페이지를 확인할 수 있다.
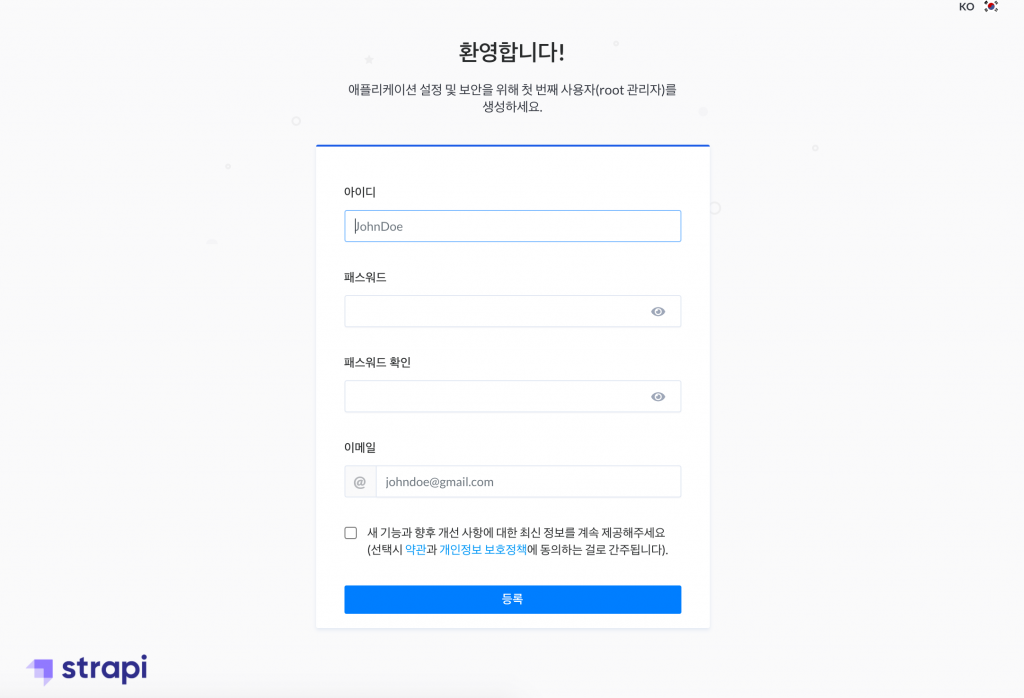
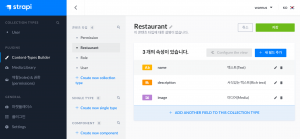
원하는 아이디와 패스워드로 계정 설정을 한다. 로그인하면 다음과 같은 메인페이지로 이동한다.
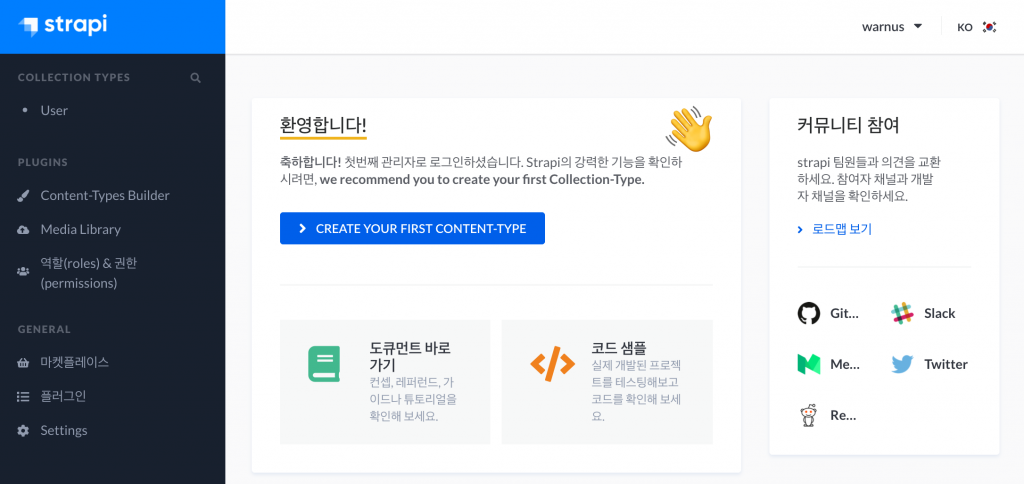
이제 frontend와 backend 준비를 마쳤다.