Restaurants 생성
앞서 만든 strapi를 이용해 레스토랑 리스트를 만든다.
Content Type 생성
- strapi의 좌측 메뉴에서 Content-Types Builder 클릭
- + Create new collection type 클릭
- restaurant 라는 이름으로 collection type을 생성한다.
- text 필드 생성을 클릭하여 Name 항목에 name 을 입력한다.
- rich text 필드 생성을 클릭하여 Name 항목에 description 을 입력한다.
- media 필드 생성을 클릭하여 Name 항목에 image 를 입력한다.
- 생성을 완료하고 ‘저장’ 한다.

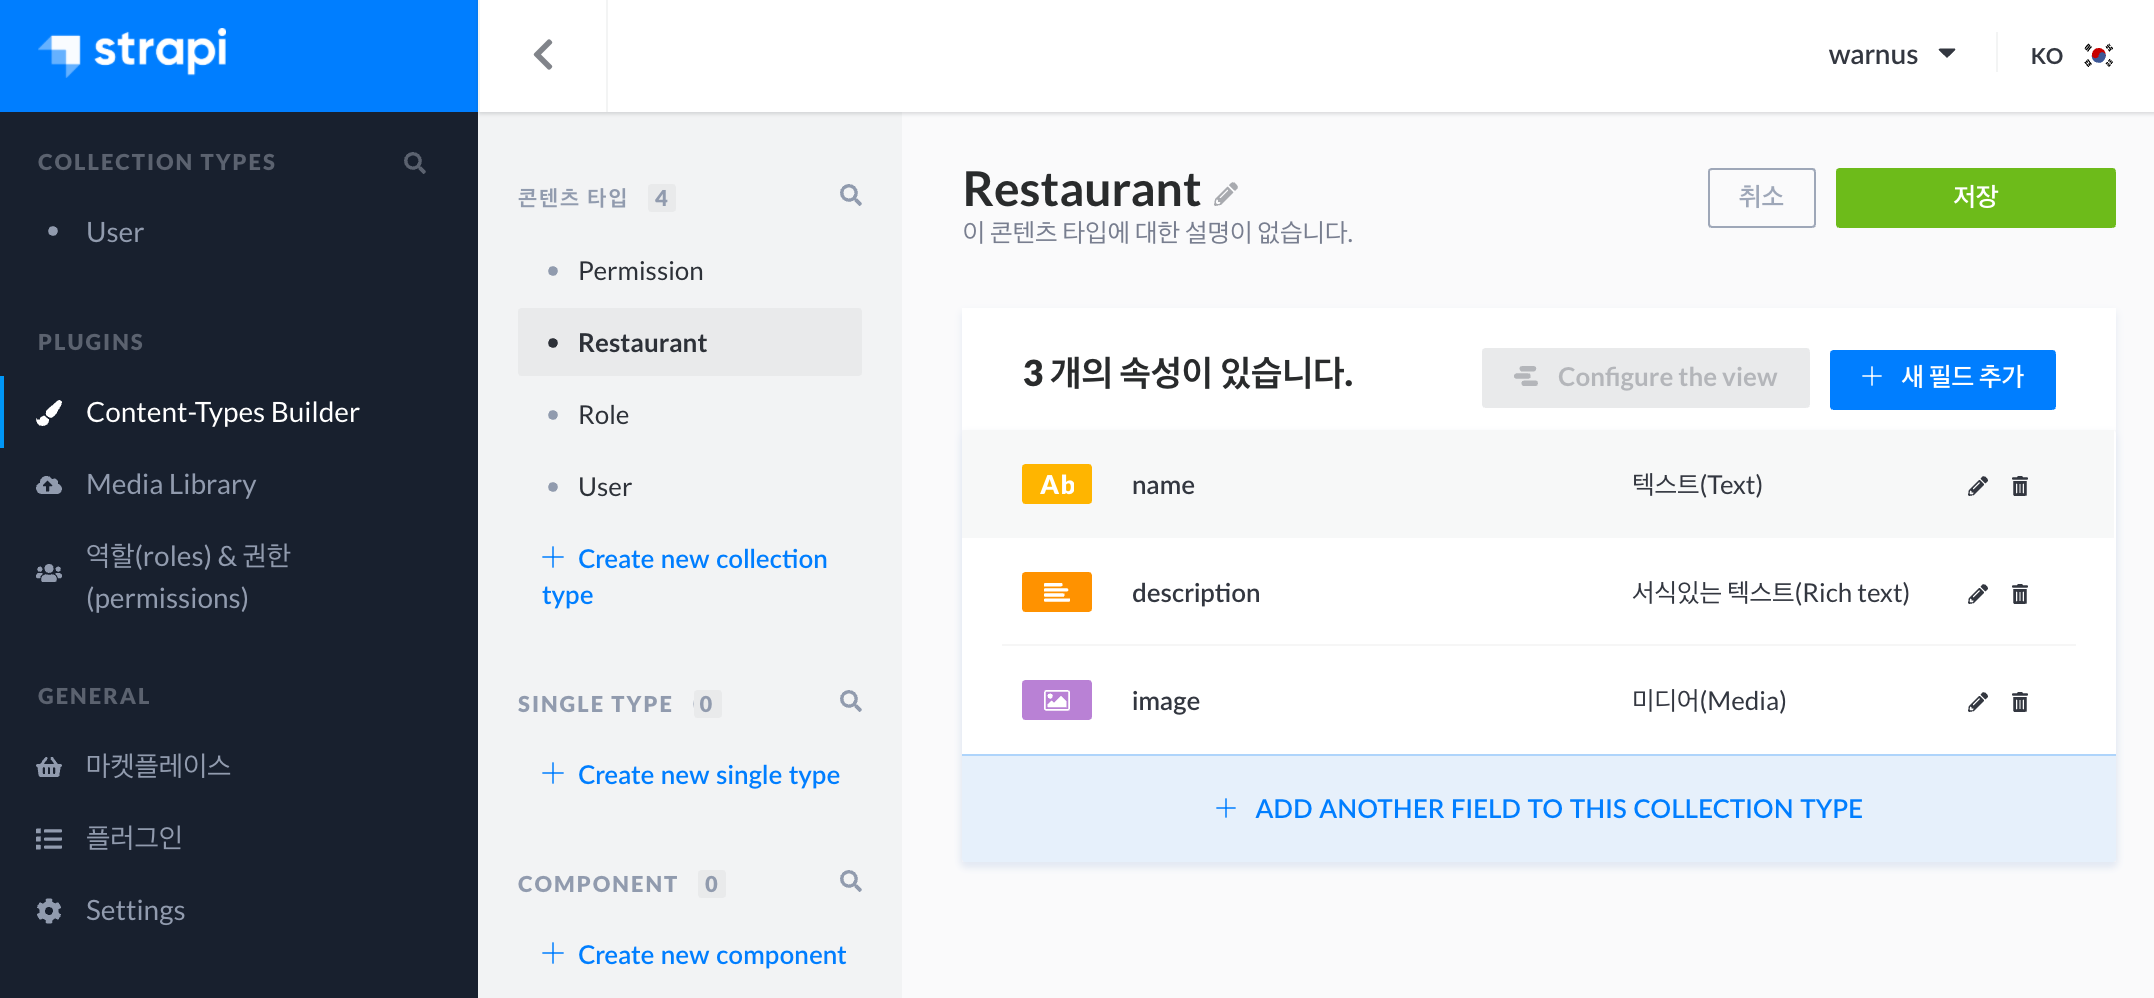
각 필드를 생성하면 위와 같은 필드들이 생성된다. 저장을 눌러야 변경사항이 적용된다.
Restaurant 데이터 생성
- 왼쪽 메뉴에서 Restaurants를 클릭
- restaurant 항목 추가 클릭
- 테스트를 위해 2~3개 정도 레스토랑 정보를 생성한다.

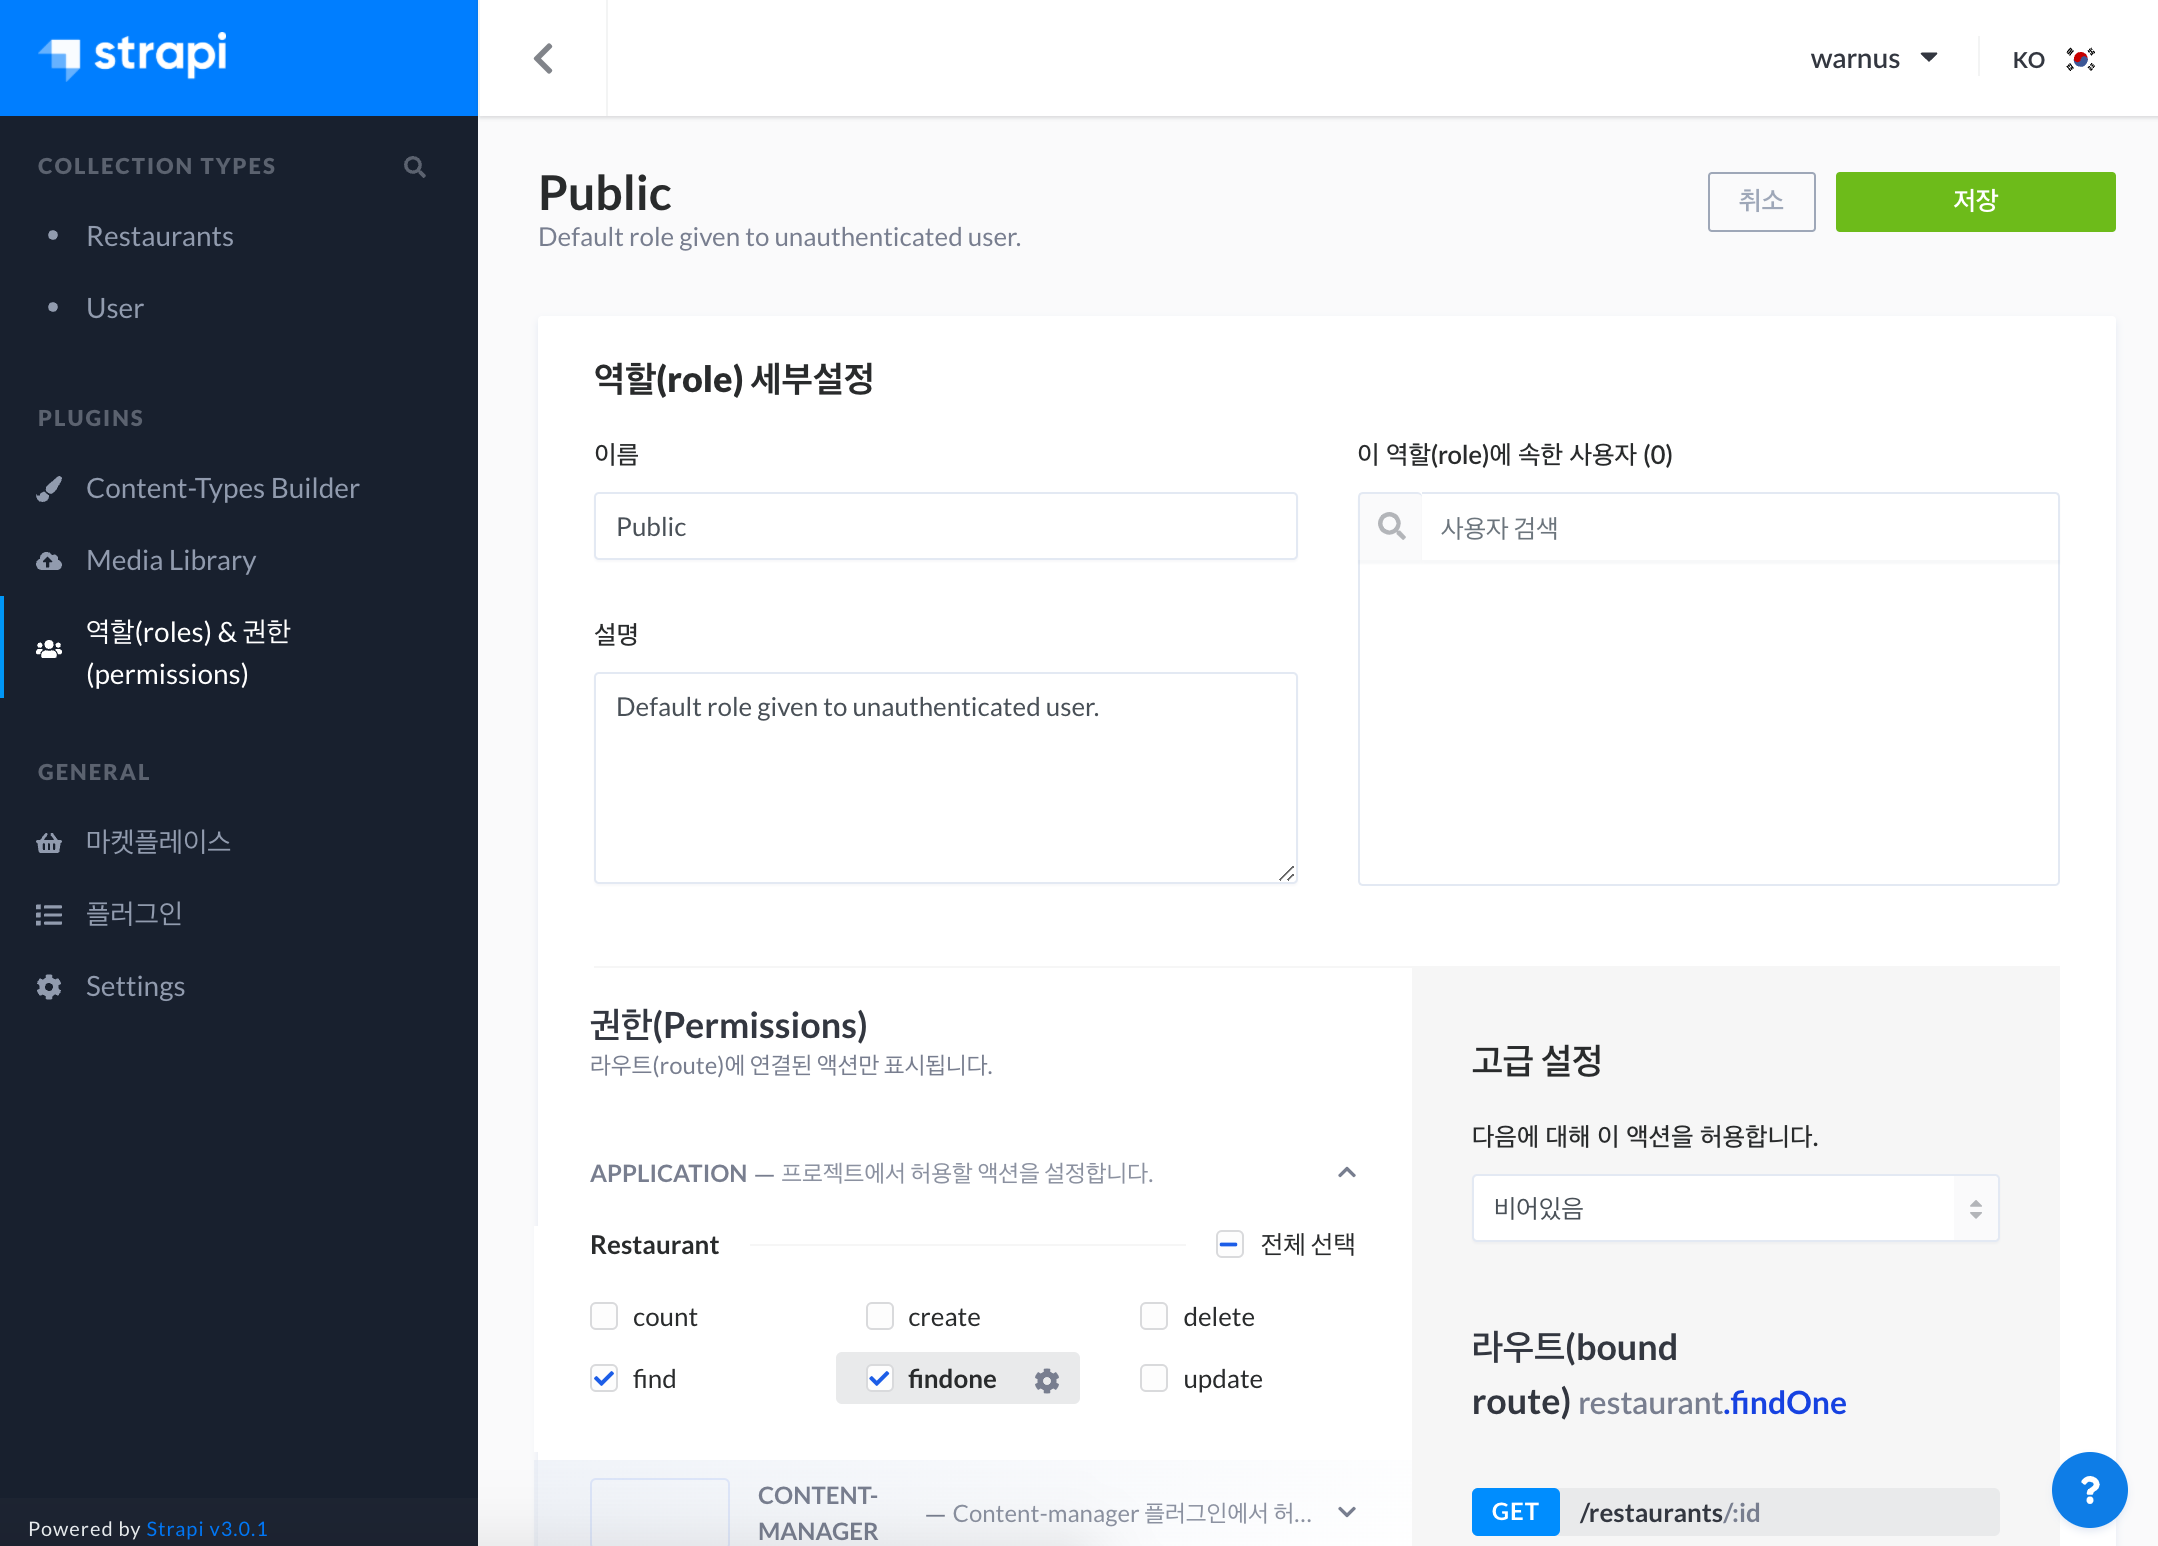
데이터 접근 설정
- 역할(roles) & 권한(permissions) 클릭
- Public 클릭
- find, findone 체크
- 저장
- 동일하게 Authenticated도 설정
이제 http://localhost:1337/restaurants 에 접속하면 다음과 같은 내용들을 확인할 수 있다.
링크 : http://localhost:1337/restaurants
[{"id":1,"name":"팍스하우스","description":"맛 좋은 호프집","created_at":"2020-06-05T02:08:46.738Z","updated_at":"2020-06-05T02:08:46.738Z","image":[{"id":1,"name":"coffee","alternativeText":"","caption":"","width":5508,"height":3672,"formats":{"thumbnail":{"hash":"thumbnail_coffee_aac4b9bcf7","ext":".jpeg","mime":"image/jpeg","width":234,"height":156,"size":5.77,"path":null,"url":"/uploads/thumbnail_coffee_aac4b9bcf7.jpeg"},"large":{"hash":"large_coffee_aac4b9bcf7","ext":".jpeg","mime":"image/jpeg","width":1000,"height":667,"size":50.5,"path":null,"url":"/uploads/large_coffee_aac4b9bcf7.jpeg"},"medium":{"hash":"medium_coffee_aac4b9bcf7","ext":".jpeg","mime":"image/jpeg","width":750,"height":500,"size":32.18,"path":null,"url":"/uploads/medium_coffee_aac4b9bcf7.jpeg"},"small":{"hash":"small_coffee_aac4b9bcf7","ext":".jpeg","mime":"image/jpeg","width":500,"height":333,"size":17.12,"path":null,"url":"/uploads/small_coffee_aac4b9bcf7.jpeg"}},"hash":"coffee_aac4b9bcf7","ext":".jpeg","mime":"image/jpeg","size":1040.46,"url":"/uploads/coffee_aac4b9bcf7.jpeg","previewUrl":null,"provider":"local","provider_metadata":null,"created_at":"2020-06-05T02:08:42.424Z","updated_at":"2020-06-05T02:08:42.424Z"}]},{"id":2,"name":"큰손칼국수","description":"맛 좋은 얼큰칼국수","created_at":"2020-06-05T02:11:32.866Z","updated_at":"2020-06-05T02:11:32.866Z","image":[{"id":2,"name":"큰손칼국수_카카오맵","alternativeText":"","caption":"","width":2158,"height":1720,"formats":{"thumbnail":{"hash":"thumbnail__f55e3bc1f2","ext":".png","mime":"image/png","width":196,"height":156,"size":85.81,"path":null,"url":"/uploads/thumbnail__f55e3bc1f2.png"},"large":{"hash":"large__f55e3bc1f2","ext":".png","mime":"image/png","width":1000,"height":797,"size":1806.75,"path":null,"url":"/uploads/large__f55e3bc1f2.png"},"medium":{"hash":"medium__f55e3bc1f2","ext":".png","mime":"image/png","width":750,"height":598,"size":1064.41,"path":null,"url":"/uploads/medium__f55e3bc1f2.png"},"small":{"hash":"small__f55e3bc1f2","ext":".png","mime":"image/png","width":500,"height":399,"size":496.93,"path":null,"url":"/uploads/small__f55e3bc1f2.png"}},"hash":"_f55e3bc1f2","ext":".png","mime":"image/png","size":6663.43,"url":"/uploads/_f55e3bc1f2.png","previewUrl":null,"provider":"local","provider_metadata":null,"created_at":"2020-06-05T02:11:20.299Z","updated_at":"2020-06-05T02:11:20.299Z"}]}]
GraphQL 설정하기
backend 디렉토리로 이동하여 다음 명령을 실행한다.
yarn strapi install graphql
# 또는
npm run strapi install graphql
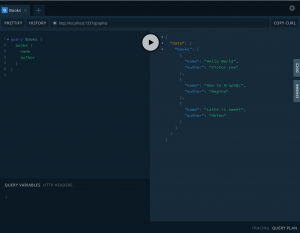
실행 후 http://localhost:1337/graphql 접속하면 아래와 같은 화면을 볼 수 있다.

이미지에서와 같이 왼쪽에 gql 구문을 다음과 같이 입력하고 실행하면 데이터를 얻을 수 있다.
{
  restaurants {
    id # Or _id if you are using MongoDB
    name
  }
}
frontend에서 GraphQL로 데이터 가져오기
이제 frontend 쪽에서 GraphQL로 데이터를 가져와 노출 시켜 보겠다. GraphQL Client로 apollo를 사용한다.
frontend 디렉토리에서 다음 명려을 실행한다.
yarn add @nuxtjs/apollo graphql core-js@2.6.10 apollo-cache-inmemory graphql-tag
새로 추가한 모듈을 nuxt.config.js에 다음과 같이 등록한다.
...
modules: [
  '@nuxtjs/apollo',
],
apollo: {
  clientConfigs: {
    default: {
      httpEndpoint: 'http://localhost:1337/graphql'
    }
  }
},
...
Restaurants 표시하기
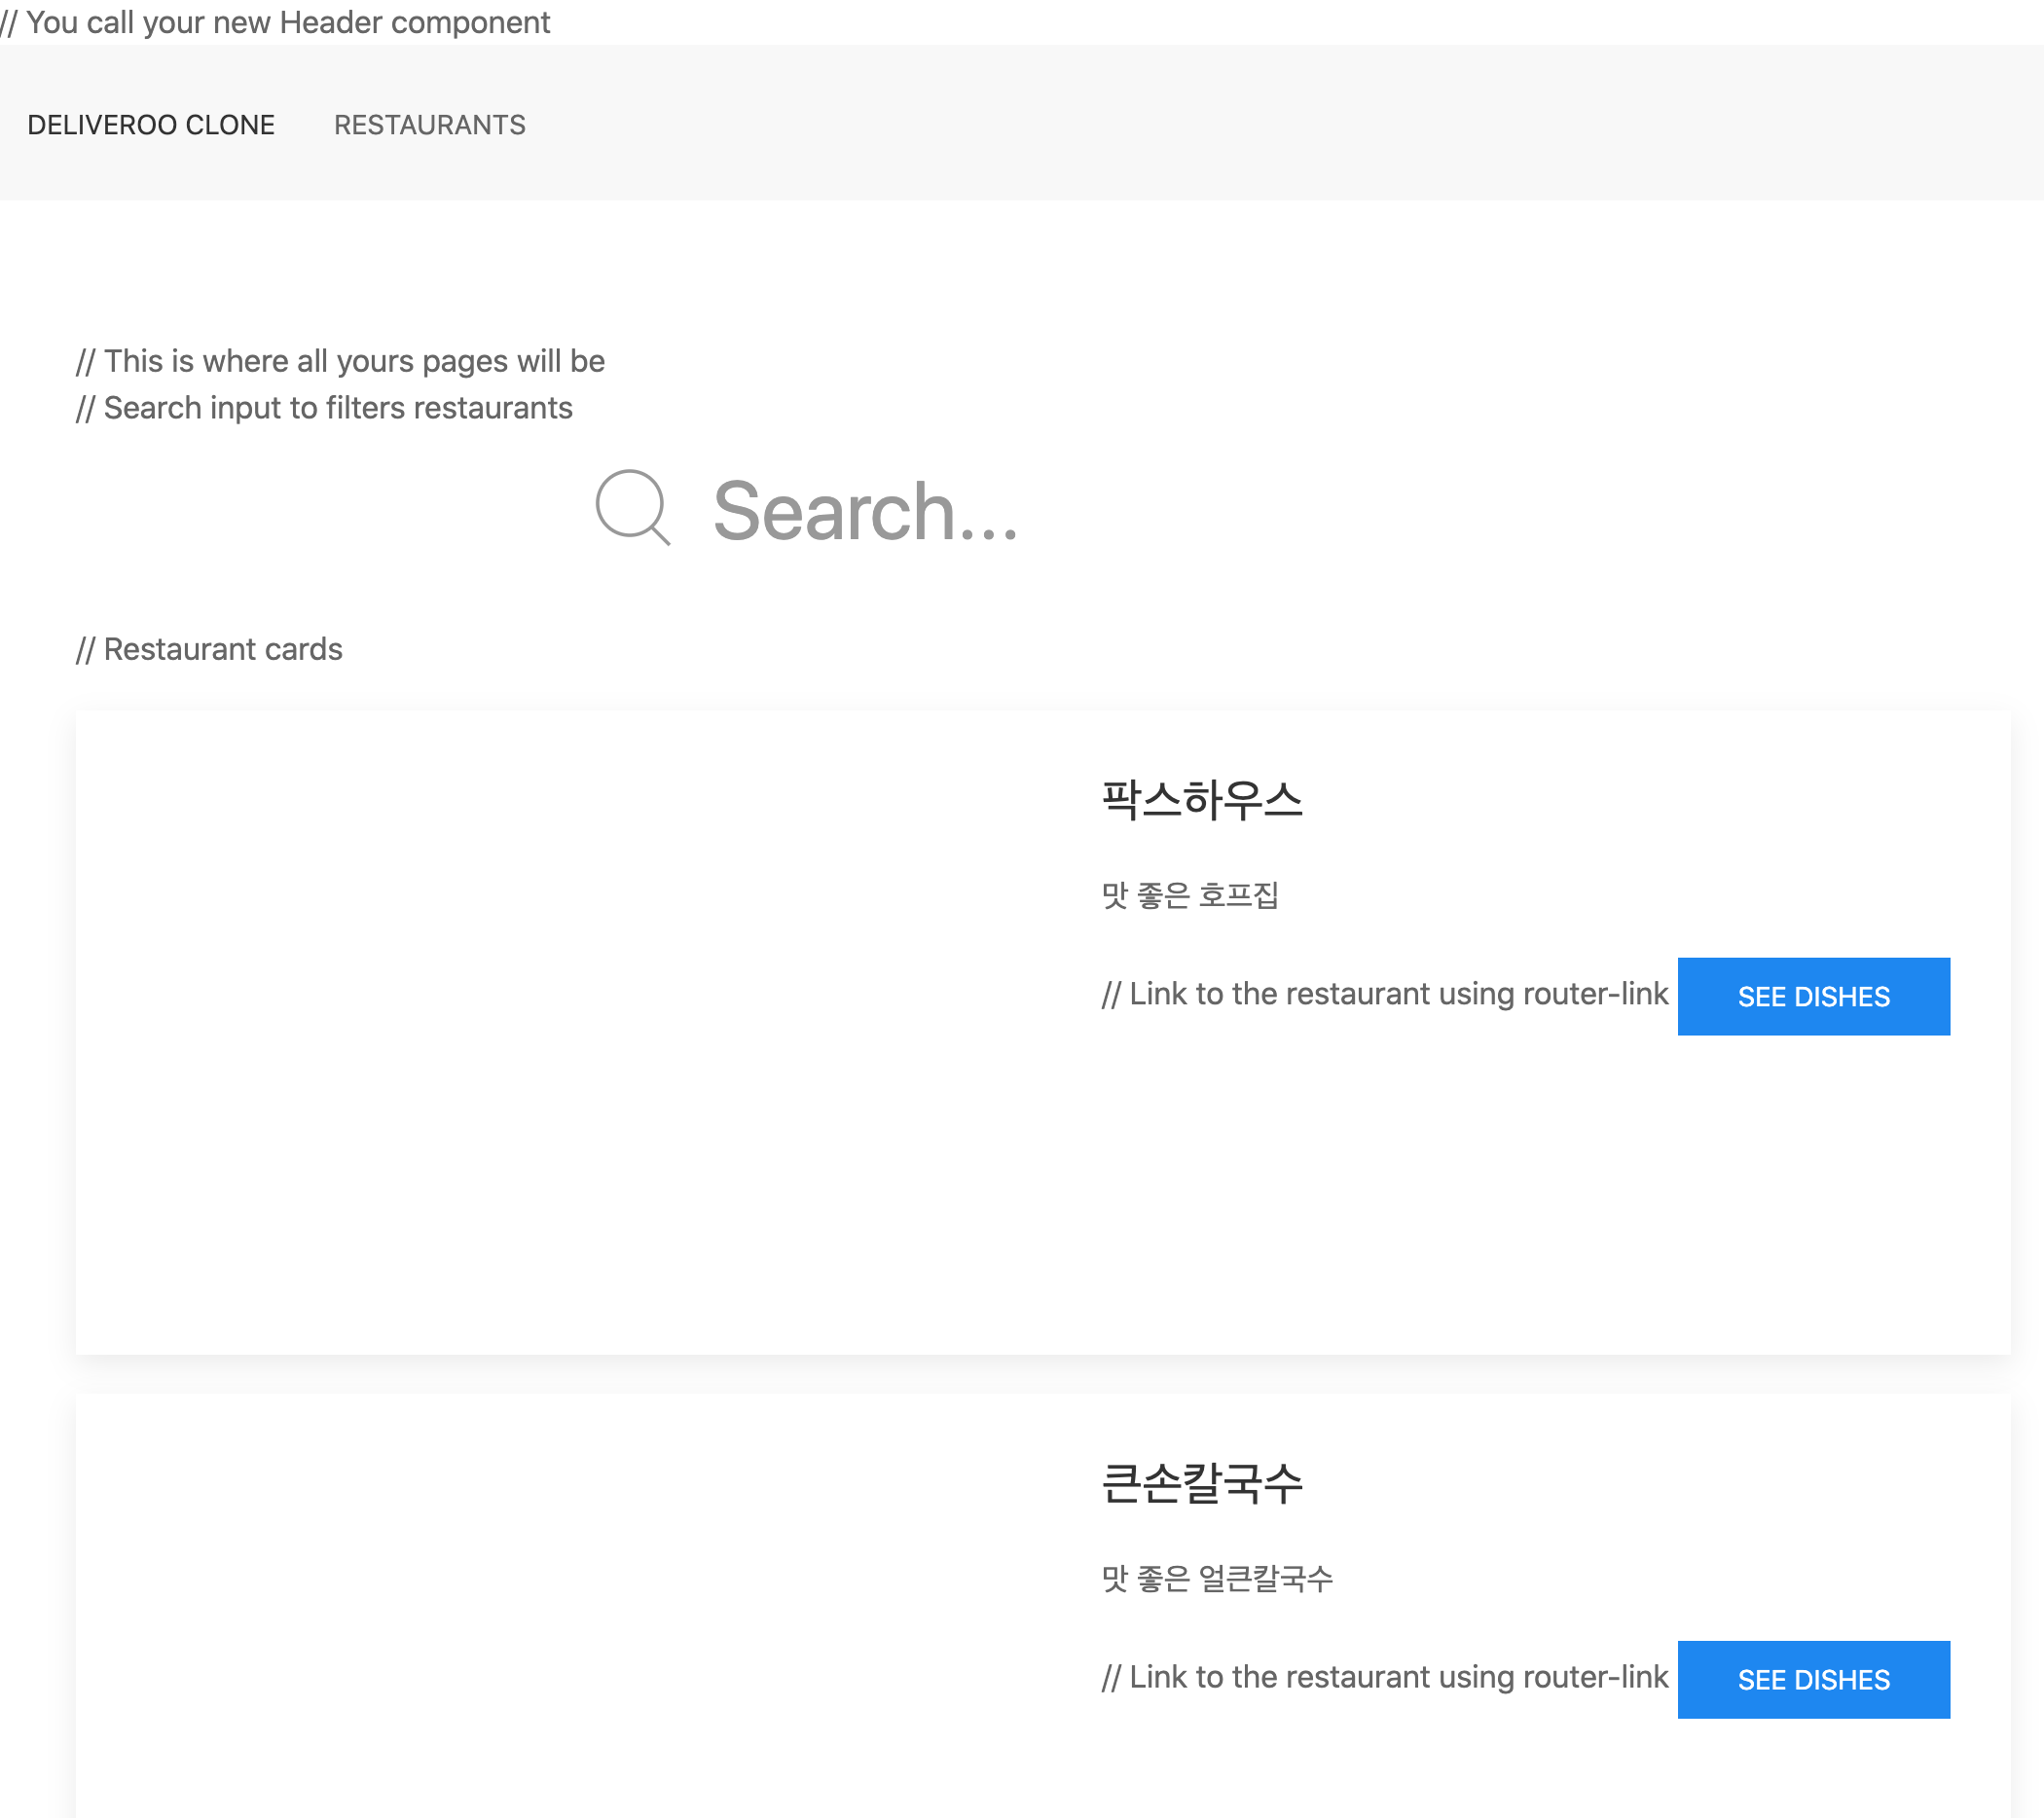
./pages/restaurants/index.vue 파일을 다음과 같이 생성한다.
<template>
  <div>

      // Search input to filters restaurants
      <form class="uk-search uk-search-large uk-align-center uk-margin">
          <span uk-search-icon></span>
          <input class="uk-search-input" v-model="query" type="search" placeholder="Search...">
      </form>

      // Restaurant cards
      <div class="uk-card uk-card-default uk-grid-collapse uk-child-width-1-2@m uk-margin" v-for="restaurant in filteredList" v-bind:key="restaurant" uk-grid>
          <div class="uk-card-media-left uk-cover-container">
              <img :src="'http://localhost:1337/' + restaurant.image.url" alt="" uk-cover>
              <canvas width="600" height="400"></canvas>
          </div>
          <div>
              <div class="uk-card-body">
                  <h3 class="uk-card-title">{{ restaurant.name }}</h3>
                  <p>{{ restaurant.description }}</p>
                  // Link to the restaurant using router-link
                  <router-link :to="{ name: 'restaurants-id', params: { id: restaurant.id }}" tag="a" class="uk-button uk-button-primary">See dishes
                  </router-link>
              </div>
          </div>
      </div>

      // If no restaurants have been found
      <div class="uk-container uk-container-center uk-text-center" v-if="filteredList.length == 0">
       <img src="https://assets-ouch.icons8.com/preview/19/52de2377-696e-4194-8c63-0a81aef60b4f.png" height="800" width="800">
       <p>No restaurants found</p>
     </div>

  </div>

</template>

<script>
// Import the restaurants query
import restaurantsQuery from '~/apollo/queries/restaurant/restaurants'

export default {
  data() {
    return {
      // Initialize an empty restaurants variabkle
      restaurants: [],
      query: ''
    }
  },
  apollo: {
    restaurants: {
      prefetch: true,
      query: restaurantsQuery
    }
  },
  computed: {
    // Search system
    filteredList() {
      return this.restaurants.filter(restaurant => {
        return restaurant.name.toLowerCase().includes(this.query.toLowerCase())
      })
    },
  }
}
</script>
GraphQL로 데이터를 가져오기 위해 gql 파일을 다음과 같이 생성한다.
frontend/apollo/queries/restaurant/restaurants.gql
query Restaurants {
  restaurants {
    id
    name
    description
    image {
      url
    }
  }
}
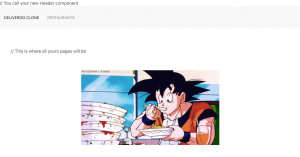
웹페이지 확인
모든 작업이 완료되고 http://localhost:3000/restaurants 에 접속하면 아래와 같은 완성된 페이지를 확인할 수 있다.
연관포스트