프로젝트 생성
vue create my-app
cd my-app
vue add vuetify
npm install --save axios
my-app 프로젝트 디렉토리를 생성하고 vuetify를 추가한다.
프로젝트 실행
npm run serve
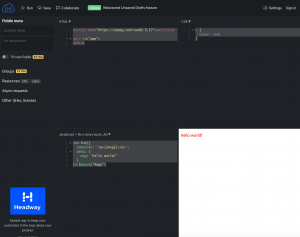
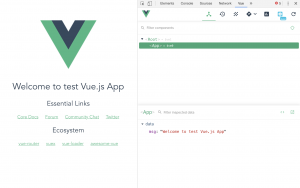
웹페이지 접속
 DONE  Compiled successfully in 22191ms                                                                                                                                    14:18:43


  App running at:
  - Local:   http://localhost:8080/
  - Network: http://172.23.146.114:8080/

  Note that the development build is not optimized.
  To create a production build, run npm run build.
http://localhost:8080 에 접속한다.

Vuetify 컴포넌트 배치하기
파일업로드를 위해 File input 컴포넌트와 Upload 버튼을 넣어보자.
https://vuetifyjs.com/ko/components/file-inputs/
위 사이트에 접속하면 File Input 컴포넌트에 대한 설명을 확인할 수 있다.
File Input 컴포넌트 추가
src/App.vue
<template>
  <v-app>
    <v-app-bar
      app
      color="primary"
      dark
    >
      <div class="d-flex align-center">
        <v-img
          alt="Vuetify Logo"
          class="shrink mr-2"
          contain
          src="https://cdn.vuetifyjs.com/images/logos/vuetify-logo-dark.png"
          transition="scale-transition"
          width="40"
        />

        <v-img
          alt="Vuetify Name"
          class="shrink mt-1 hidden-sm-and-down"
          contain
          min-width="100"
          src="https://cdn.vuetifyjs.com/images/logos/vuetify-name-dark.png"
          width="100"
        />
      </div>

      <v-spacer></v-spacer>


      <v-btn
        href="https://github.com/vuetifyjs/vuetify/releases/latest"
        target="_blank"
        text
      >
        <span class="mr-2">Latest Release</span>
        <v-icon>mdi-open-in-new</v-icon>
      </v-btn>
    </v-app-bar>

    <v-main>
      <v-file-input v-model="files" show-size label="File input"></v-file-input>
      <p>File Name : {{ files.name }}</p>
      <HelloWorld/>
    </v-main>
  </v-app>
</template>

<script>
import HelloWorld from './components/HelloWorld';

export default {
  name: 'App',

  components: {
    HelloWorld,
  },

  data: () => ({
    files: [],
  }),
};
</script>
파입 업로드를 위한 컴포넌트가 추가된 걸 확인할 수 있다.

업로드 버튼 컴포넌트 추가
src/App.vue
<template>
  <v-app>
    <v-app-bar
      app
      color="primary"
      dark
    >
      <div class="d-flex align-center">
        <v-img
          alt="Vuetify Logo"
          class="shrink mr-2"
          contain
          src="https://cdn.vuetifyjs.com/images/logos/vuetify-logo-dark.png"
          transition="scale-transition"
          width="40"
        />

        <v-img
          alt="Vuetify Name"
          class="shrink mt-1 hidden-sm-and-down"
          contain
          min-width="100"
          src="https://cdn.vuetifyjs.com/images/logos/vuetify-name-dark.png"
          width="100"
        />
      </div>

      <v-spacer></v-spacer>


      <v-btn
        href="https://github.com/vuetifyjs/vuetify/releases/latest"
        target="_blank"
        text
      >
        <span class="mr-2">Latest Release</span>
        <v-icon>mdi-open-in-new</v-icon>
      </v-btn>
    </v-app-bar>

    <v-main>
      <v-file-input v-model="files" show-size label="File input"></v-file-input>
      <v-btn @click="upload" color="primary">Upload</v-btn>
      <p>File Name : {{ files.name }}</p>
      <HelloWorld/>
    </v-main>
  </v-app>
</template>

<script>
import HelloWorld from './components/HelloWorld';

export default {
  name: 'App',

  components: {
    HelloWorld,
  },

  data: () => ({
    files: [],
  }),

  methods: {
    upload() {
      console.log("Hello, Upload")
      console.log(this.files.name)
    }

  }
};
</script>
업로드 버튼이 생겼으며 버튼을 클릭하면 console 로그로 메시지가 출력된다.

Axios를 이용한 파일 업로드
이제 업로드 버튼이 실제 업로드 동작을 할 수 있도록 Axios를 이용한다. 백엔드는 임시로 strapi를 사용했다.
src/App.vue
<template>
  <v-app>
    <v-app-bar
      app
      color="primary"
      dark
    >
      <div class="d-flex align-center">
        <v-img
          alt="Vuetify Logo"
          class="shrink mr-2"
          contain
          src="https://cdn.vuetifyjs.com/images/logos/vuetify-logo-dark.png"
          transition="scale-transition"
          width="40"
        />

        <v-img
          alt="Vuetify Name"
          class="shrink mt-1 hidden-sm-and-down"
          contain
          min-width="100"
          src="https://cdn.vuetifyjs.com/images/logos/vuetify-name-dark.png"
          width="100"
        />
      </div>

      <v-spacer></v-spacer>


      <v-btn
        href="https://github.com/vuetifyjs/vuetify/releases/latest"
        target="_blank"
        text
      >
        <span class="mr-2">Latest Release</span>
        <v-icon>mdi-open-in-new</v-icon>
      </v-btn>
    </v-app-bar>

    <v-main>
      <v-file-input v-model="files" show-size label="File input"></v-file-input>
      <v-btn @click="upload" color="primary">Upload</v-btn>
      <p>File Name : {{ files.name }}</p>
      <HelloWorld/>
    </v-main>
  </v-app>
</template>

<script>
import HelloWorld from './components/HelloWorld';
import axios from 'axios'

export default {
  name: 'App',

  components: {
    HelloWorld,
  },

  data: () => ({
    files: [],
  }),

  methods: {
    async upload() {
      var fd = new FormData();
      fd.append('files', this.files)

      await axios.post('http://localhost:1337/upload',
            fd, {
              headers: {
                'Content-Type': 'multipart/form-data'
              }
            }
          ).then( response => {
            console.log('SUCCESS!!');
            console.log(response.data)
          })
          .catch(function () {
            console.log('FAILURE!!');
          });
    }

  }
};
</script>
파일을 선택하고 업로드 버튼을 클릭하면 Axios 메소드가 동작하고 정상 업로드 시 아래와 같은 response 값을 받을 수 있다.

strapi에서 보면 아래와 같이 정상적으로 파일이 업로드 된 것을 볼 수 있다.