vuex에 대해 잘 정리된 예제가 있어 정리한다.
Vue 프로젝트 생성
vue 명령을 이용해 Manual 설정으로 프로젝트를 생성한다. 추가 패키지로 Babel, Router, Vuex, CSS Pre-processors, Linter를 선택했다.
$ vue create vuex_example

Vue CLI v4.4.6
? Please pick a preset: Manually select features
? Check the features needed for your project: Babel, Router, Vuex, CSS Pre-processors, Linter
? Use history mode for router? (Requires proper server setup for index fallback in production) Yes
? Pick a CSS pre-processor (PostCSS, Autoprefixer and CSS Modules are supported by default): Sass/SCSS (with dart-sass)
? Pick a linter / formatter config: Basic
? Pick additional lint features: Lint on save
? Where do you prefer placing config for Babel, ESLint, etc.? In package.json
? Save this as a preset for future projects? No
Axios 패키지 설치
npm install --save axios
JSON Server 생성
본 예제에서는 임의로 JSON Server를 만들어서 Axios를 이용해 데이터를 가져와 Vuex store에 저장하고 이를 컴포넌트에서 보여주는 일련의 과정을 보여줄 것이다.
json-server 패키지를 이용하면 간단히 json을 반환하는 서버를 구축할 수 있다. json-server를 설치하자.
npm install -g json-server
json-server를 이용해 json 포멧 데이터 리스트를 데이터베이스 처럼 사용할 수 있다. 다음과 같이 테스트용 데이터를 만들자.
{
    "users": [
        {
            "id": 1,
            "name": "Leanne Graham",
            "email": "Sincere@april.biz"
        },
        {
            "id": 2,
            "name": "Ervin Howell",
            "email": "Shanna@melissa.tv"
        },
        {
            "id": 3,
            "name": "Clementine Bauch",
            "email": "Nathan@yesenia.net"
        }
    ]
}
데이터 파일을 만들고 다음 명령으로 서버를 실행한다.
json-server --watch database.json
서버 실 행 후 다음과 같은 URL로 데이터 조회가 가능하다.
store/index.js
vue 프로젝트 생성 시 vuex를 포함하여 생성하면 기본으로 store디렉토리에 index.js 파일이 생성된다.
import Vue from 'vue'
import Vuex from 'vuex'

Vue.use(Vuex)

export default new Vuex.Store({
  state: {
  },
  mutations: {
  },
  actions: {
  },
  modules: {
  }
})
index.js는 state, mutations, actions, modules와 같은 기본 골격으로 된 내용으로 되어 있다.
Vuex Store를 이용하여 State 생성 및 관리하기
이제 앞서 만들었던 서버로 부터 데이터를 생성/삭제/수정/조회 등을 할 수 있는 모듈을 만들고 View에 보여주는 예제를 만들어보자.
store/modules/users-module.js
import axios from 'axios'

const state = {
    users: []
};

const getters = {
    usersList: state => state.users
};

const actions = {
    async fetchUsers({commit}){
      const response = await axios.get("http://localhost:3000/users");
      commit("setUsers", response.data)
    },
    async addUsers({commit}, user){
      const response = await axios.post("http://localhost:3000/users", user);
      commit("addNewUser", response.data)
    },
    async deleteUser({commit}, id){
      await axios.delete(`http://localhost:3000/users/${id}`);
      commit("removeUser", id)
    }
};

const mutations = {
    setUsers: (state, users) => (
        state.users = users
    ),
    addNewUser: (state, user) => state.users.unshift(user),
    removeUser: (state, id) => (
        state.users.filter(user => user.id !== id),
        state.users.splice(user => user.id, 1)
    )
};

export default {
    state,
    getters,
    actions,
    mutations
}
store/index.js
import Vue from 'vue'
import Vuex from 'vuex'
import UsersModule from '../store/modules/users-module'

Vue.use(Vuex)

export default new Vuex.Store({
  state: {
  },
  mutations: {
  },
  actions: {
  },
  modules: {
    UsersModule
  }
})
Vuex Store에 데이터를 추가하는 컴포넌트 만들기
앞서 만들었던 database.json은 User 리스트를 가지고 있는 데이터 파일이다. 이 데이터 리스트에 신규 유저를 추가하는 컴포넌트를 만들자.
components/AddUser.vue
<template>
 <form @submit.prevent="onUserSubmit">
  <div class="form-group">
    <input type="text" class="form-control" placeholder="Enter name" v-model="name">
  </div>
  <div class="form-group">
    <input type="text" class="form-control" placeholder="Enter email" v-model="email">
  </div>
  <button type="submit" class="btn btn-block btn-primary">Add</button>
</form>
</template>

<script>
import { mapActions } from "vuex";

export default {
  name: 'AddUser',
  data(){
      return {
        name: '',
        email: ''
      }
  },
  methods:{
    ...mapActions(["addUsers"]),
    onUserSubmit() {
        this.addUsers({
          name: this.name,
          email: this.email
        })
    }
  }
}
</script>
components/Users.vue
User 리스트를 보여주는 Users 컴포넌트를 만든다.
<template>
  <div>
    <ul class="list-group mt-5">
      <li class="list-group-item list-group-item-action" v-for="user in usersList" :key="user.id">

        <div class="d-flex w-100 justify-content-between">
          <h3>{{user.name}}</h3>

          <small class="text-danger delete" @click="deleteUser(user.id)">✕</small>
        </div>
        <p>{{user.email}}</p>

      </li>
    </ul>
  </div>
</template>

<script>
  import {
    mapGetters,
    mapActions
  } from "vuex";

  export default {
    name: 'Users',
    methods: {
      ...mapActions(["fetchUsers", "deleteUser"])
    },
    computed: mapGetters(["usersList"]),
    created() {
      this.fetchUsers()
    }
  }
</script>

<style>
 .delete {
   font-size: 18px;
   cursor: pointer;
 }
</style>
App.vue 수정
만든 컴포넌트들이 메인에 보여질 수 있도록 App.vue 파일을 수정한다.
App.vue
<template>
  <div class="container">
    <AddUser />
    <Users />
  </div>
</template>

<script>
import AddUser from '../src/components/AddUser'
import Users from '../src/components/Users'
export default {
  name: 'App',
  components: {
    AddUser,
    Users
  }
}
</script>

<style>
  .container {
    max-width: 500px;
    padding-top: 50px;
  }
</style>
Bootstrap 추가
Bootstrap 스타일 적용을 위해 link를 추가해준다.
public/index.html
<!DOCTYPE html>
<html lang="en">
  <head>
    <meta charset="utf-8">
    <meta http-equiv="X-UA-Compatible" content="IE=edge">
    <meta name="viewport" content="width=device-width,initial-scale=1.0">
    <link rel="icon" href="<%= BASE_URL %>favicon.ico">
    <link rel="stylesheet" href="https://stackpath.bootstrapcdn.com/bootstrap/4.4.1/css/bootstrap.min.css">
    <title><%= htmlWebpackPlugin.options.title %></title>
  </head>
  <body>
    <noscript>
      <strong>We're sorry but <%= htmlWebpackPlugin.options.title %> doesn't work properly without JavaScript enabled. Please enable it to continue.</strong>
    </noscript>
    <div id="app"></div>
    <!-- built files will be auto injected -->
  </body>
</html>
실행
npm run serve
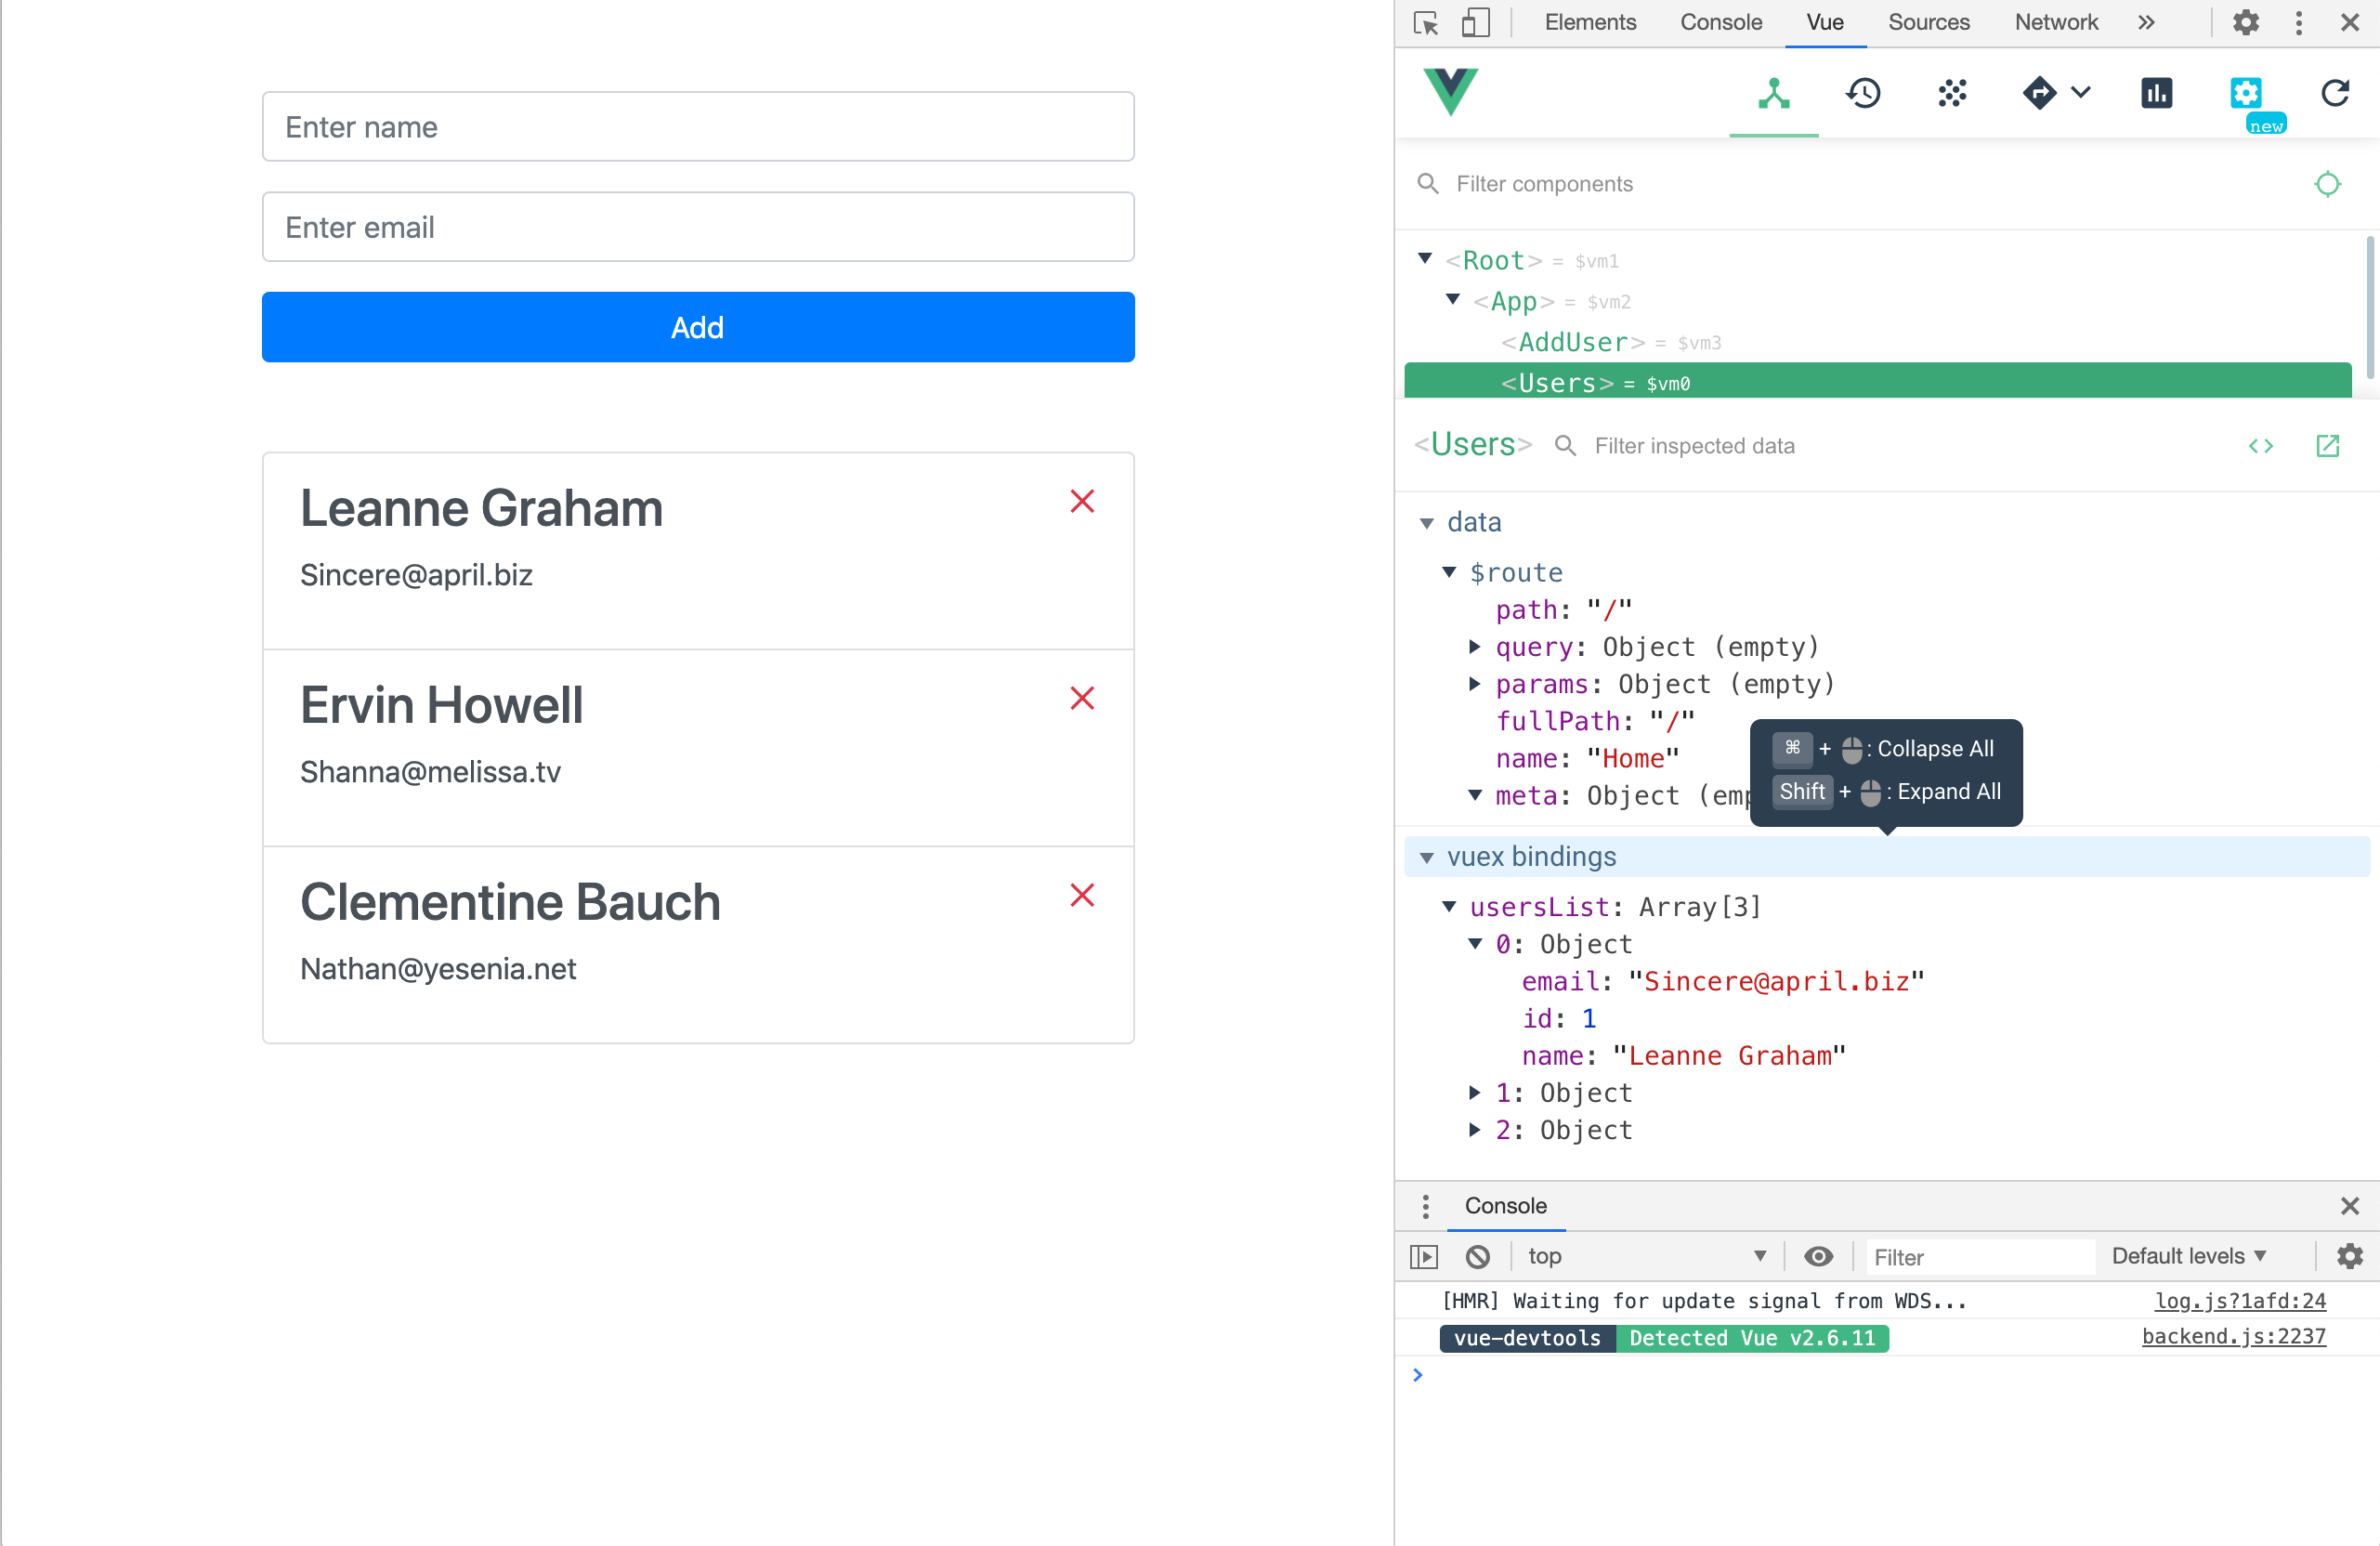
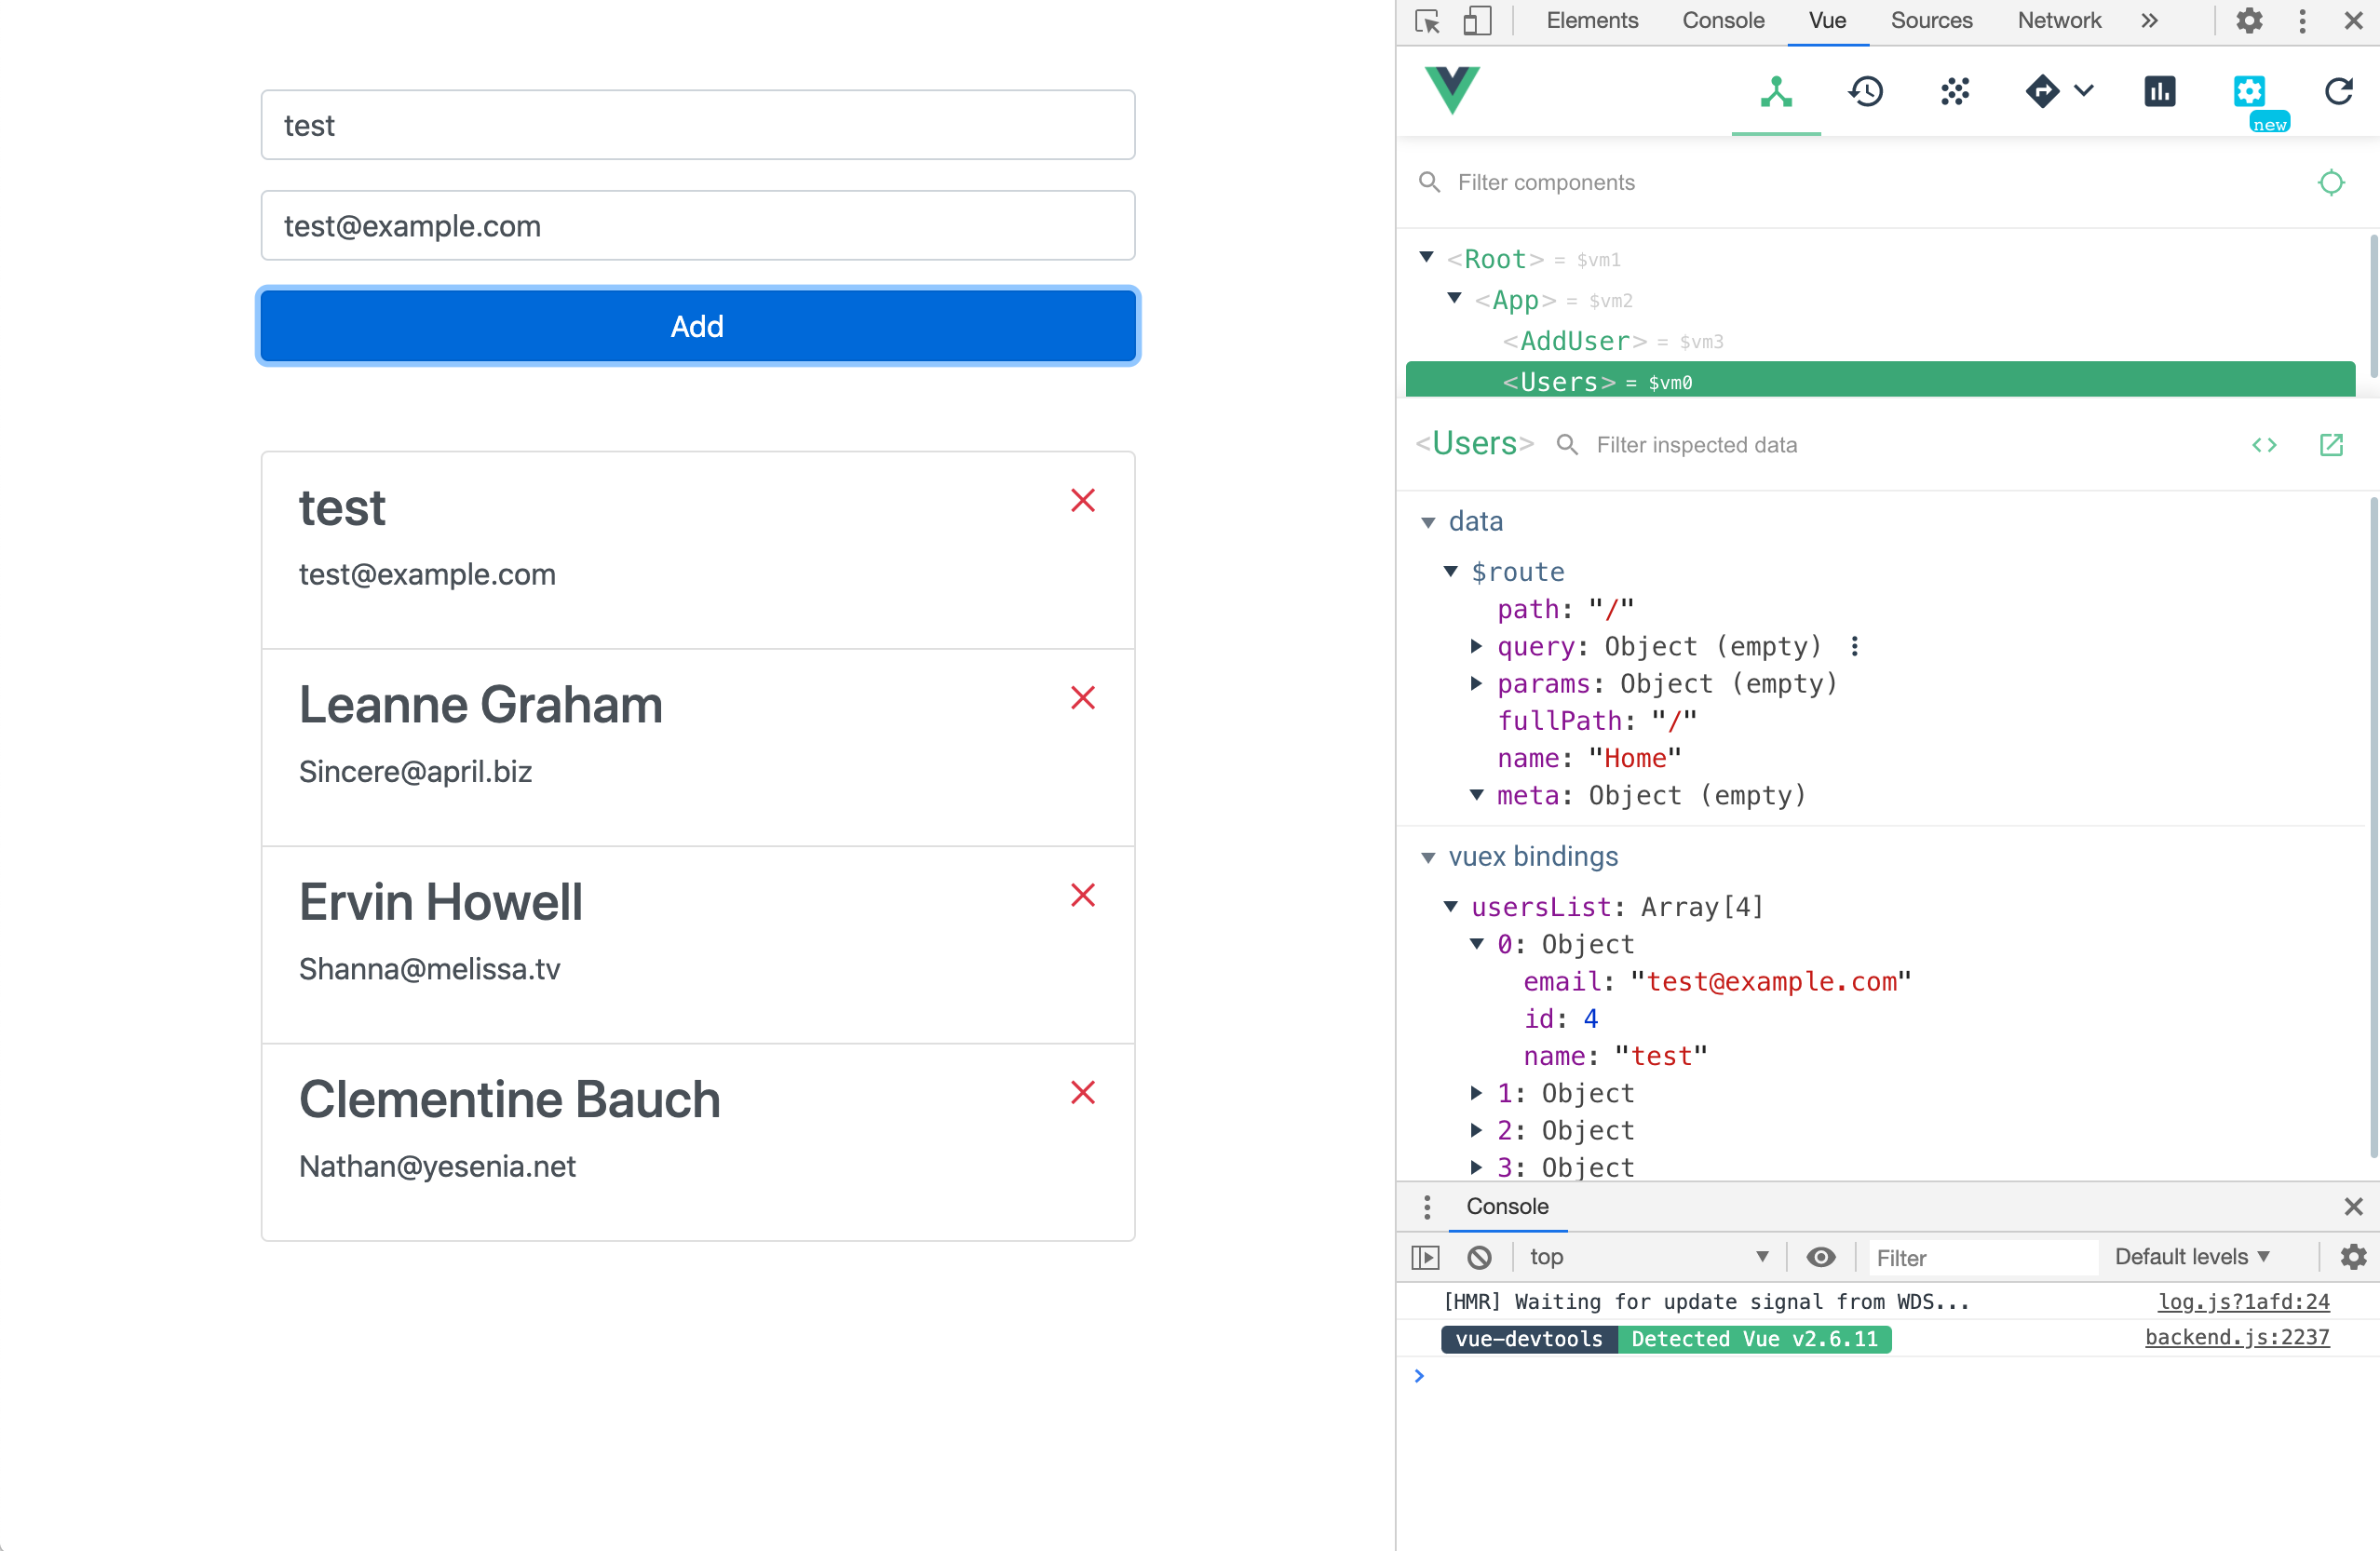
데이터 추가 시 아래와 같이 정상적으로 데이터가 추가되는 걸 확인할 수 있다.
해당 내용은 원작자가 github에도 소스코드를 올려두었다.